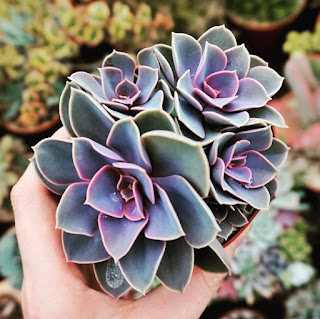
How to separate Aloe plants for successful propagation
Alright, plant enthusiasts and aloe aficionados, gather around for a little chat about one of the most rewarding houseplant activities out there: separating aloe plants. If you've noticed your aloe vera starting to look a bit like a crowded city during rush hour, it's probably time to give those pups (also known as offsets) a new home. Not only is this process super satisfying, but it's also a fantastic way to expand your green family or share the love with friends. Let's dive into the how-to of aloe separation with some easy-to-follow steps and tips.
Why Separate Aloe Plants?
First off, why bother separating them? Well, aloes are incredibly generous plants. They produce pups that can overcrowd their space, leading to competition for light, nutrients, and water. Separating these pups gives each plant its own space to thrive, ensuring you have healthy, happy aloes that can continue to soothe burns, moisturize skin, and purify the air.
When to Separate
Timing is everything. The best time to separate aloe pups is during the spring or early summer when the plants are in their active growing phase. This timing gives the new plants the best chance to establish themselves before the slower growth periods of fall and winter.
Tools You'll Need
- Clean, sharp knife or shears
- Potting mix, preferably one formulated for succulents or cacti
- Optional: gardening gloves to protect your hands from aloe spikes
Step-by-Step Guide to Separation
1. Prep Your Workspace: Choose a clean, flat surface to work on and gather your tools and pots.
2. Gently Remove the Aloe: Carefully take the parent plant out of its pot. You might need to tap the bottom of the pot or run a knife around the edge to loosen it. Be gentle to minimize root damage.
3. Inspect and Decide: Look for pups that are a good size to separate, ideally with their own roots. These are the young plants you'll be giving a new home.
4. The Separation: Using your clean, sharp knife or scissors, cut the pup away from the parent plant. Make sure each pup has some roots attached. If the pup doesn’t have roots yet, it’s better to wait a bit longer before separating.
5. Potting the Pups: Fill your new pots with the succulent potting mix. Make a hole in the center of each pot for the pups. Place a pup in each hole and gently pat the soil around it to secure it in place. Don’t water immediately – waiting a few days allows any cuts to callous over and helps prevent root rot.
6. Aftercare: Keep the newly potted pups in a warm, brightly lit area but out of direct sunlight for the first few days to avoid stressing them. After about a week, you can start watering them lightly, allowing the soil to dry out between waterings fully.
Additional Tips
- Patience Is Key: Don’t worry if your aloe pups don’t seem to grow much at first. They’re putting a lot of energy into establishing their roots. With time and proper care, they’ll start to flourish.
- Watering Wisdom: Remember, aloes store water in their leaves, so they don’t need to be watered as frequently as other plants. Overwatering is a common mistake that can lead to root rot.
- Sharing the Aloe Love: Separated aloe plants make fantastic gifts. Share them with friends, family, or neighbors to spread a little green joy.
Wrapping It Up
Separating aloe plants is a rewarding activity that helps ensure the health and vitality of your aloes. It's a fantastic way to multiply your collection or share these beneficial plants with others. With the right tools, a bit of know-how, and some patience, you'll be a pro at separating aloes in no time. Happy gardening!

.png)


